|
Temperature & humidity are extremely important factors in the success of keeping a pet snail. They could be the main factors in ensuring your snail has a long and healthy life; however there are many factors involved in the process of climatizing a snail tank. In order to help you through this process we have provided a guide to snail heating & humidity
Firstly you will need to know the right temperature & humidity you species of G.A.L.S. require. To find this information please visit: TYPES OF G.A.L.S. |
|
|
|
REASONS FOR HEATING & HIGH HUMIDITY
Due to the fact that G.A.L.S come from Africa it is necessary for you as an exotic animal keeper to replicate their natural living environment within the housing you have created for them. The reason for keeping a warm temperature in your snails vivarium is because G.A.L.S. are ectothermic (cold-blooded) creatures that cannot regulate their own body temperature meaning that the use the environment they are in to heat their body. Not only does a warm temperature keep the snails warm, it also aids the digestion process, therefore it is imperative that you heat your G.A.L.S. vivarium correctly. G.A.L.S like all snails prefer damp environments, they like their body to be somewhat damp. Due to them being used to a climate of high humidity it is relatively easy for them to dry-out and have health problems if the air is not damp enough.
|
|
|
HUMIDITY
|
It might take a little trial and error, but once you find the right balance keeping the humidity at the right constant is not difficult. Spray the enclosure all over with a spray bottle filled with water once or twice daily. If you have too many air holes the humidity will not hold well, so covering a few holes might be necessary. If on the other hand you have too few air holes and the substrate becomes too muddy, or the air is too humid, you will need to add a few more air holes.
The water used should have no chemicals added to it. Tap water can be used if the tap water in your area doesn’t contain too much chlorine. We advice that you leave the water sitting for 24 hours, in an open container, before using. This allows most of chlorine to evaporate from the water. Alternatively you can boil the tap water and use it once it’s lukewarm or cold. Or you can also use distilled or plane bottled water. |

|
|
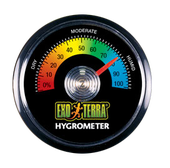
The best and only way to know if your humidity is at the right amount is by having a hygrometer. While both mechanical and digital hygrometer are good, digital ones tend to be better. Mechanical hygrometers tend to be less accurate and stop working after a short time.
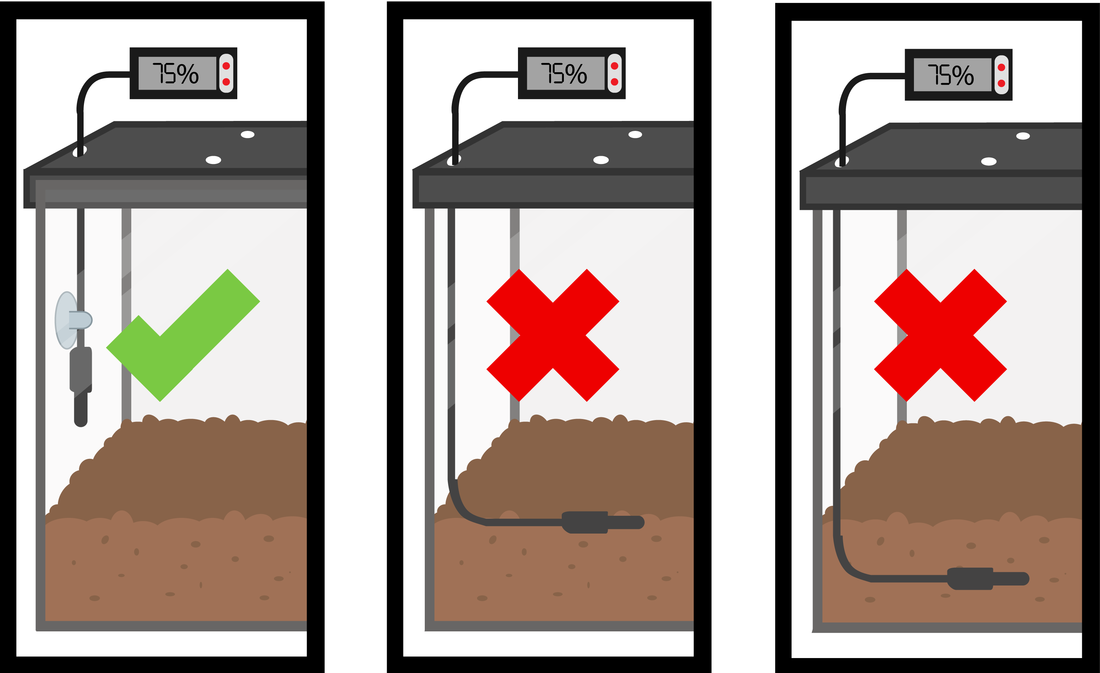
The probe should be placed in the air ideally half way up the tank. Is can be stuck of the side using a suction cup or similar. Alternatively you can have the probe hanging in the middle of the tank. NOTE: Adding moss to the enclosure can help greatly with humidity levels.
|
|
|
|
TEMPERATURE
G.A.L.S. should be provided with a temperature gradient within its housing that allows for a warm and a cool area, this is to allow the snail housed within the tank to move to a temperature where they feel comfortable. The benefits of this mean that the G.A.L.S. can move to the hot area of the tank after a meal so the heat can help them digest their food quicker.
A Thermostat and thermometer offer a good way to keep a constant eye on the temperature within your G.A.L.S home. This will be discussed in the following sections.
A Thermostat and thermometer offer a good way to keep a constant eye on the temperature within your G.A.L.S home. This will be discussed in the following sections.
|
|
|
HEAT MAT
When acquiring a heat mat the size of the heat mat is the main thing to look for, (not the wattage).
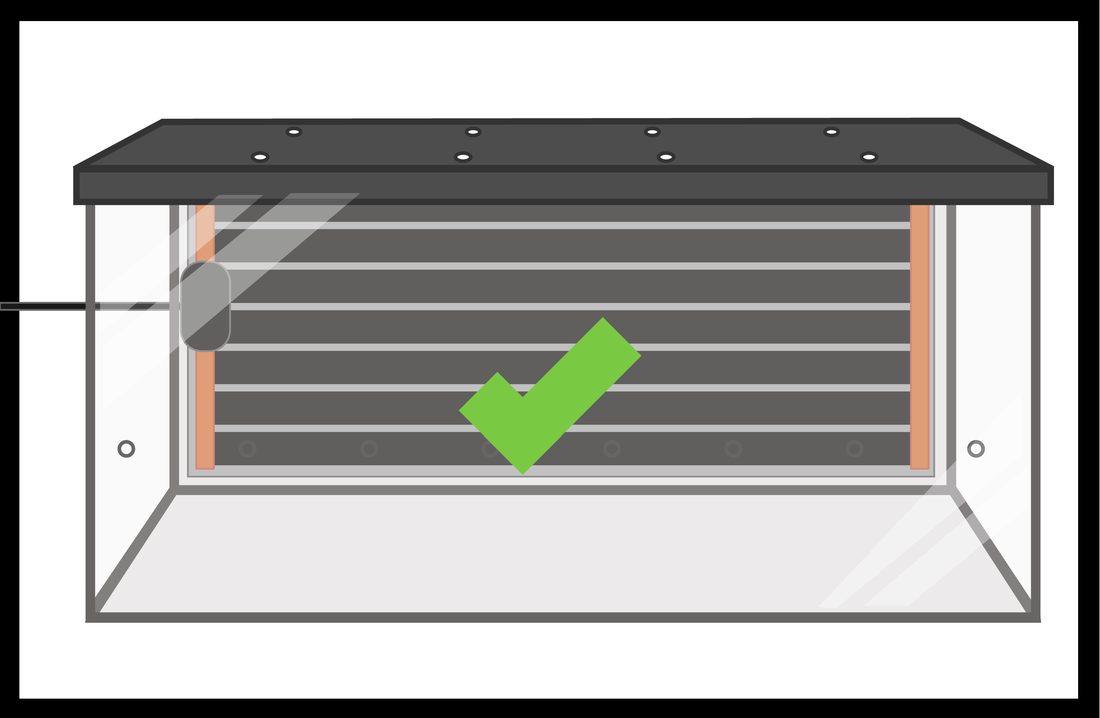
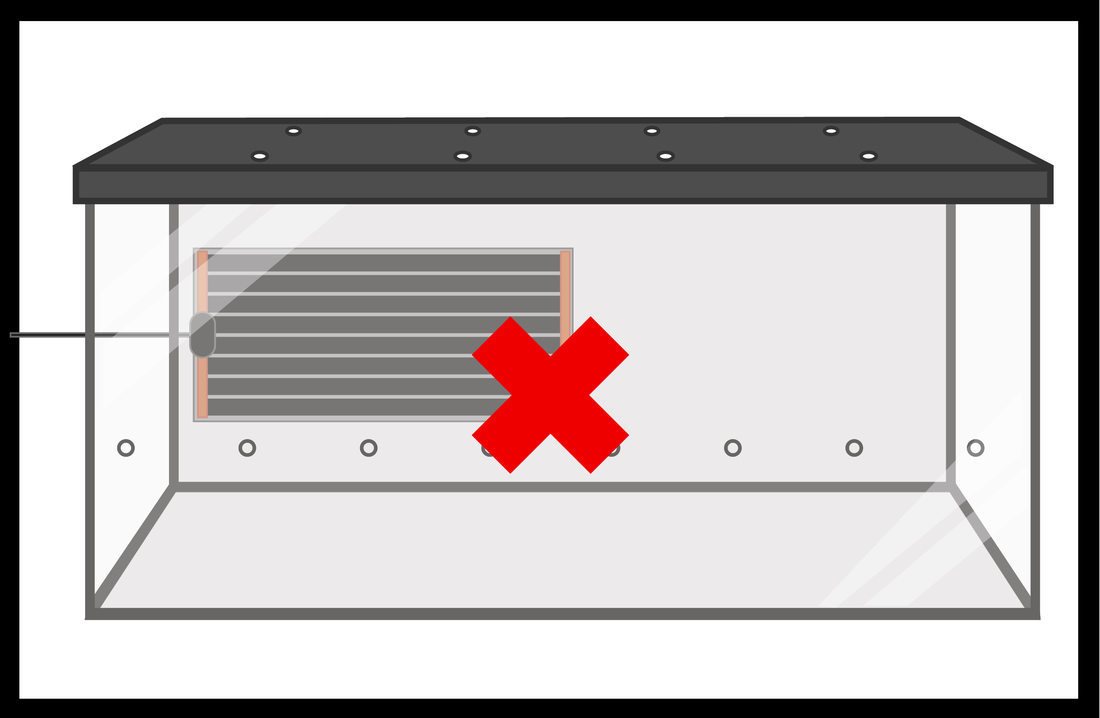
To determine the size of heat mat you will need, you have to first decide where you will place it. There are 2 different positions you can have a heat mat. Option 1The heat mat can be placed on one of the larger sides of the tank . In this case the heat mat should be as large as the entire side.
|
|
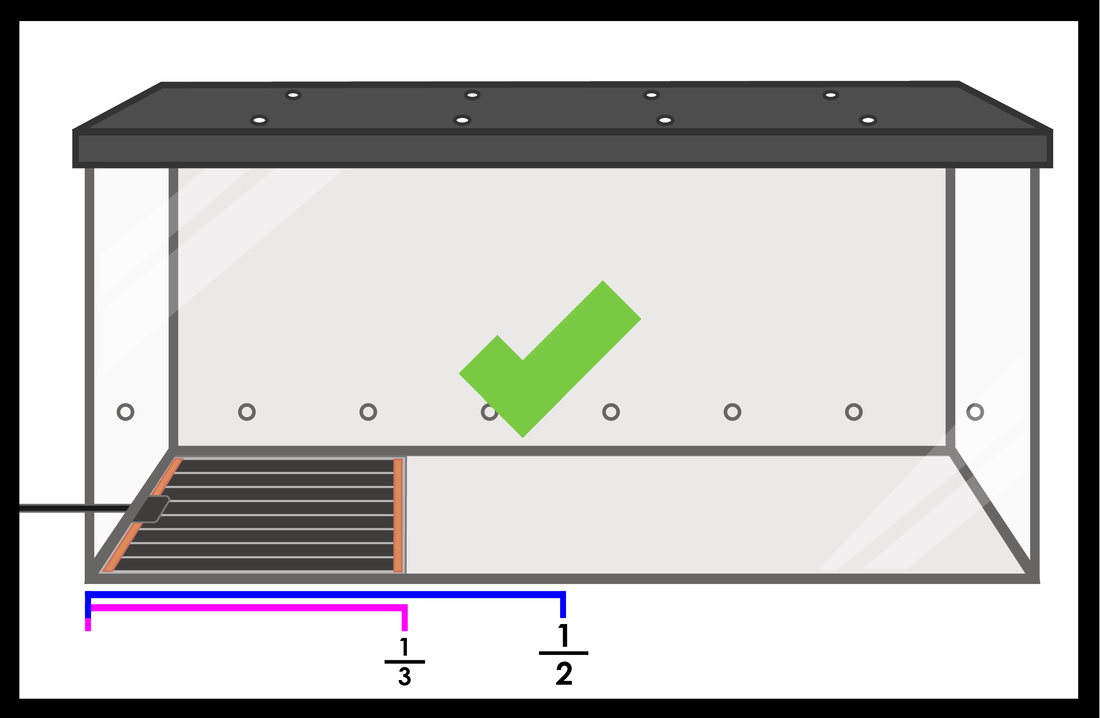
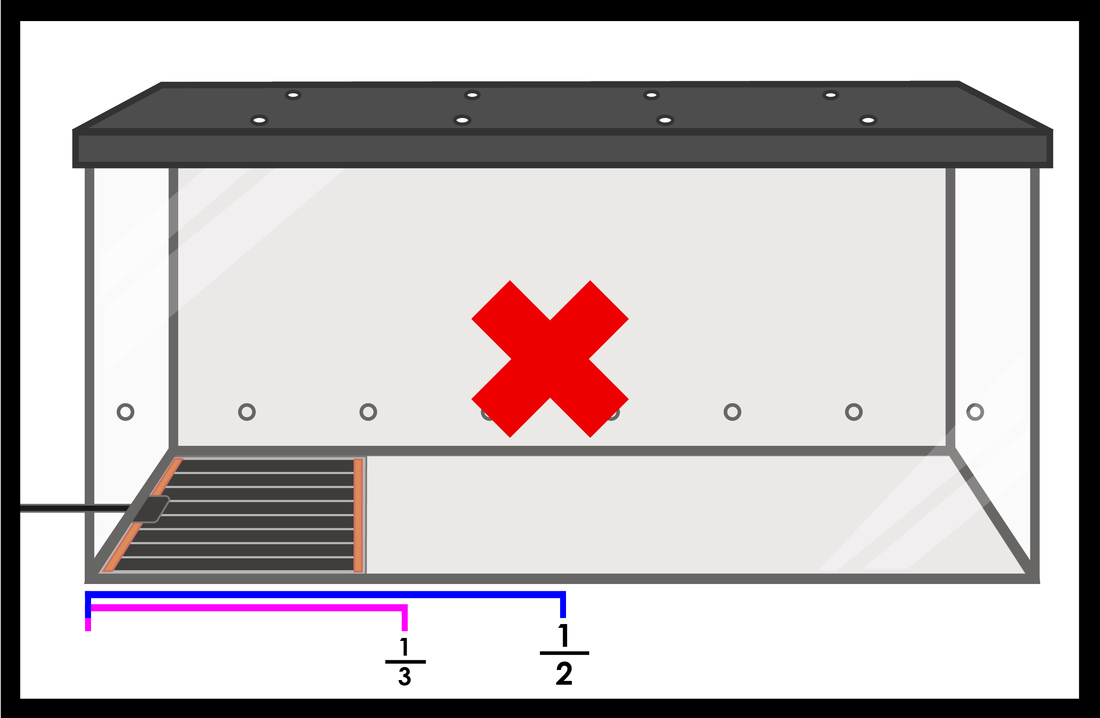
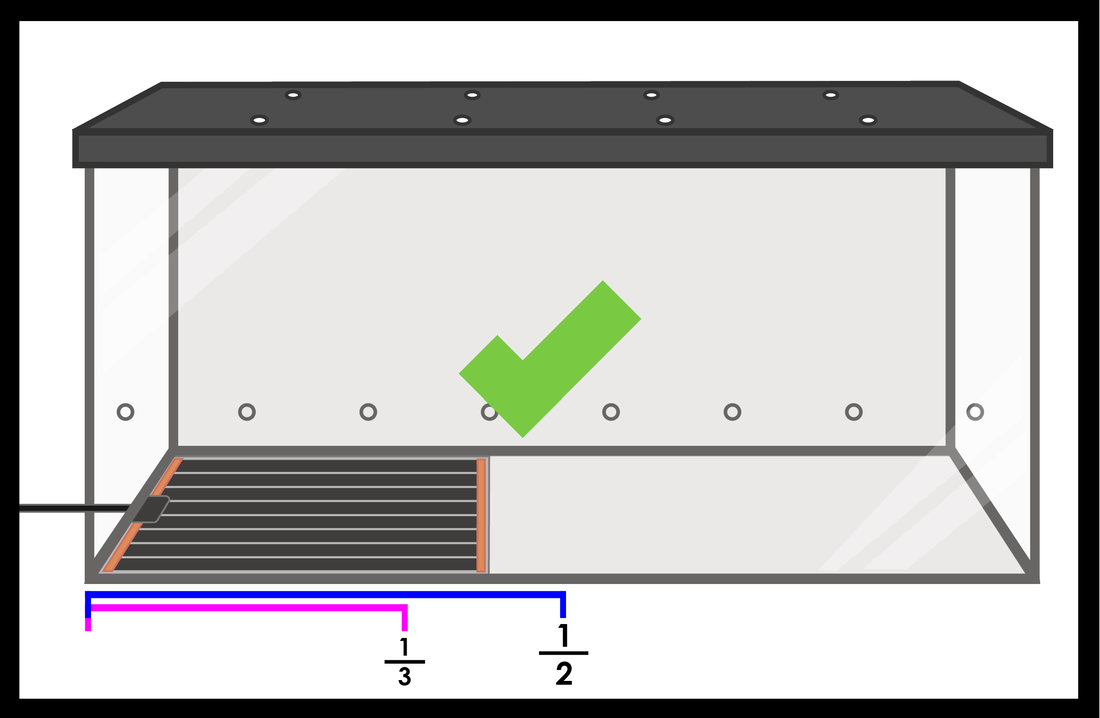
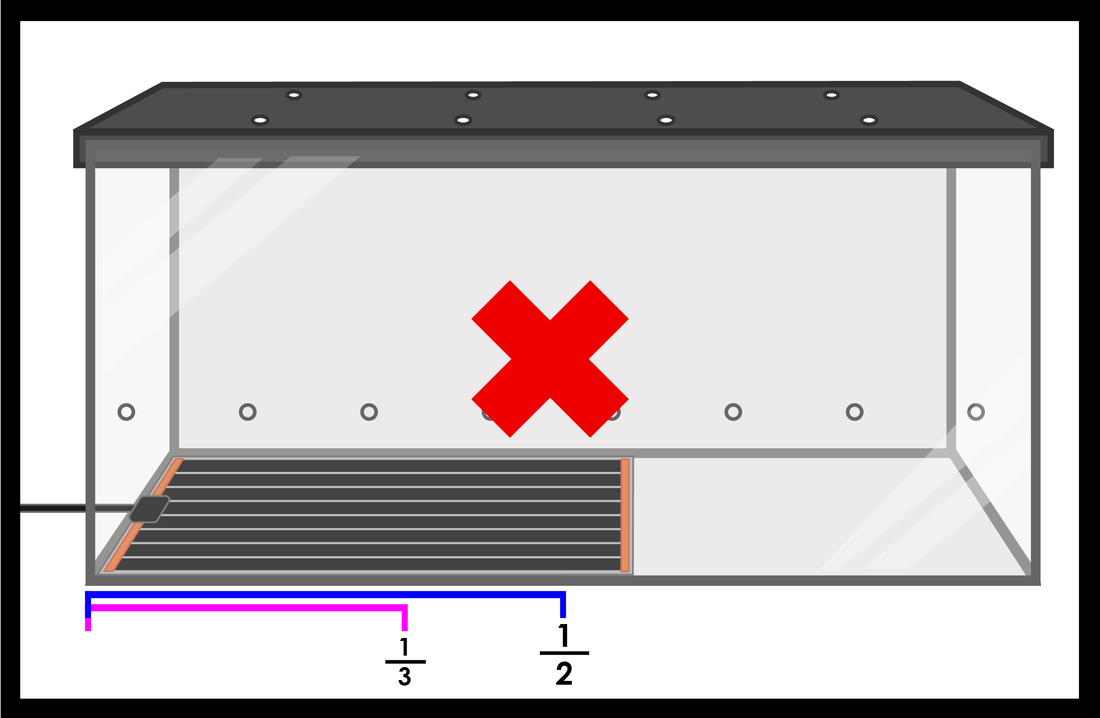
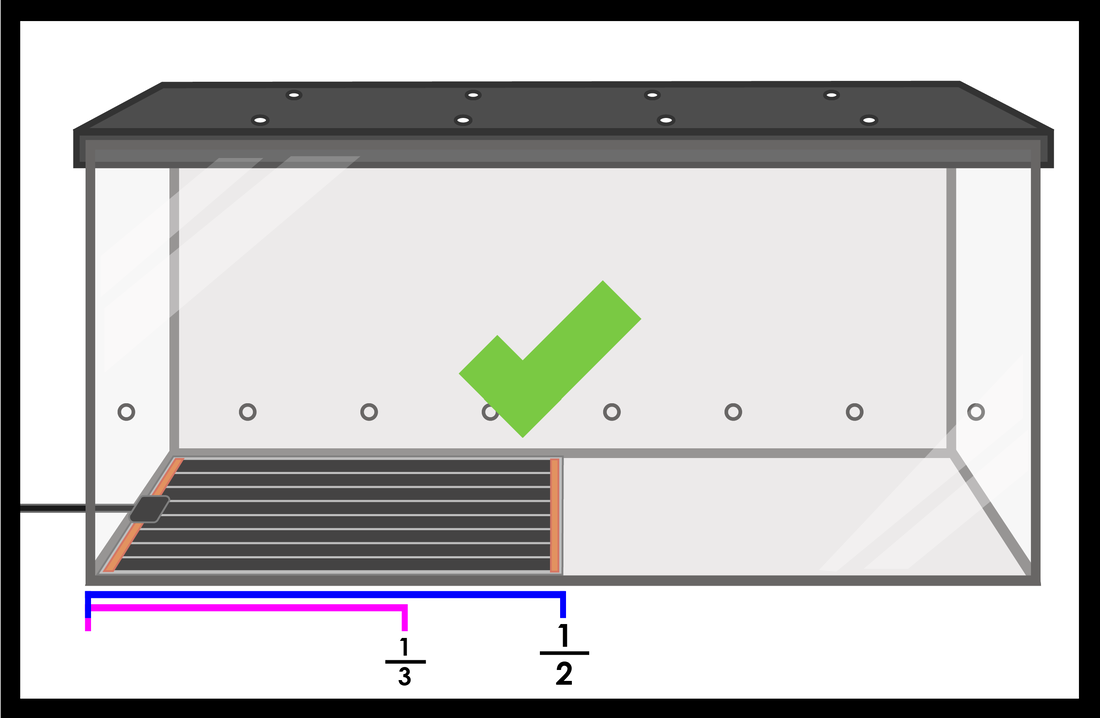
Option 2
|
The heat mat can be placed at the bottom of the tank. In this case the mat should be roughly half the side of the bottom. It can be as large as one half, but not bigger. And it can be as small as one third but not smaller. Placing the mat at the bottom is more advised as it is the most efficient way, and defiantly the method to use when housing GALS that need temperatures of 28 °C or higher.
|
|
|
NOTE
- Ensure that none of your snails can escape through holes made for cables.
- It is never advised to connect the thermostat or heat mat to an extension.
THERMOSTAT
|
While they are likely the most expensive part of a G.A.L.S. set-up they are of extreme importance. Not only do thermostats automatically monitor and regulate temperatures (arguably the most important aspect of G.A.L.S husbandry) they help protect against faulty heat mats resulting in overheating and/or fires. Whilst G.A.L.S can tolerate cool temperatures for a period, severe overheating can cause death in just a few minutes. It is un-plausible for a G.A.L.S keeper to check the temperature of the enclosure several times a day and night and switch the heat mat on or off accordingly, and even if this was feasible it doesn’t take out the possibility of a faulty heat mat. Enclosures with thermostatically controlled heat mats have little to worry about, but without one the results can be fatal.
There are 3 different kinds of thermostats: |
|
|
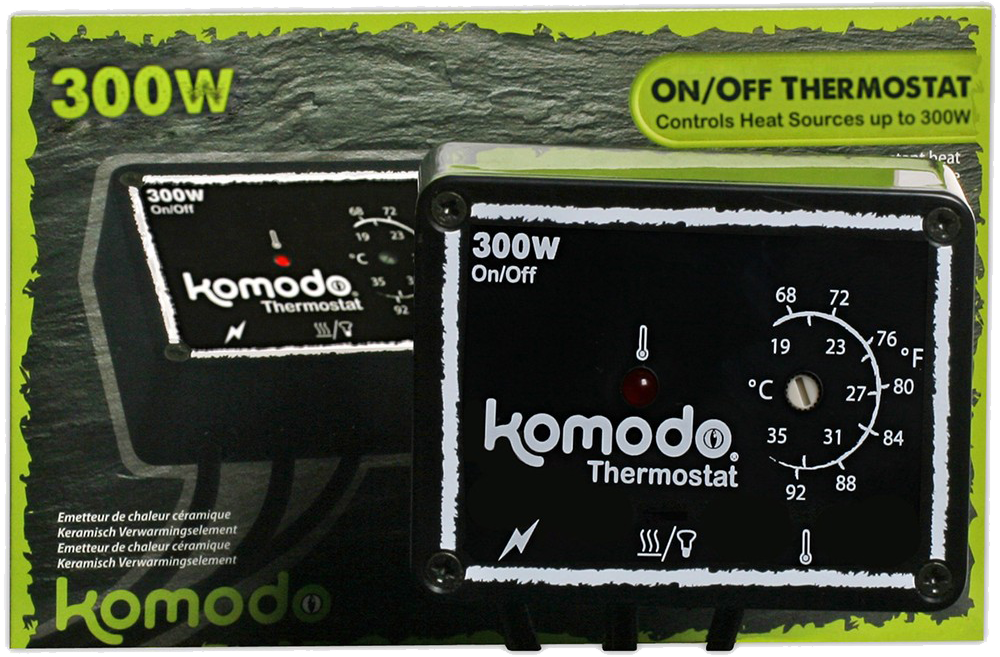
ON/OFF MAT STATS
On/off stats are the least expensive and the most common thermostat used by G.A.L.S.keepers. They regulate the temperature by switching the heater on and off. The thermostat is set at a specific temperature and tries to maintain this between a high and low tolerance level. If the senor inside the tank reads a temperature hotter than the high tolerance then it switches the heater off. If it senses colder than the low tolerance then it switches the heater on. PULSE STATS
Pulse stats are most commonly used with ceramic heaters and these are not used in G.A.L.S. set-ups. |
DIMMER STATS
Dimmer stats are the most versatile and effective stat available and they are suitable for all applications. Although they are slightly more expensive, they are more efficient in keeping the temperature constant. Dimmers regulate the temperature by constantly regulating the power it sends to the heater. The sensor on the stat tests the temperature inside the enclosure constantly. If the temperature is too cool it will increase the power being sent to the heat mat thus increasing the temperature. If the temperature is too warm it will decrease the power being sent to the heat mat thus decreasing the temperature This constant sensing and adjusting creates only a very slight temperature change and produces much more consistent temperature control. |
STATS WITH EXTRAS!
Most thermostat brands offer a deluxe model which enables the keeper to pre-program this drop to happen automatically at a given time. While this feature would be ideal and beneficial for G.A.L.S it is not a must have requirement, and many keepers do not have/use this function.
Some manufacturers offer highly advanced thermostatic control units which can be pre-programmed and manage several enclosures from the same unit. This end of the market is constantly evolving and very specialist, but something to consider for keepers with many set-ups.
|
|
|
HOW TO SET UP YOUR THERMOSTAT & HEAT MAT
|
1. Thermostats will usually come with clear instructions as to their used, but just in case these are not clear below are the usual steps. Note that it is always wise to set up and monitor a new enclosure for a few days in advance before introducing a snail to it’s new home.
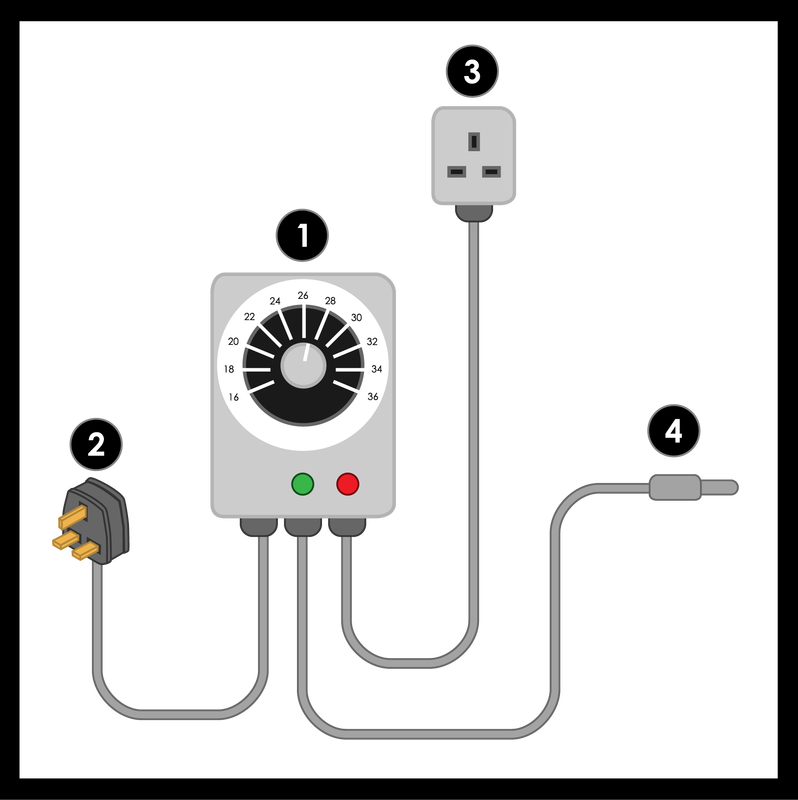
Notice that a thermostat has 4 parts to it.
2. Attach the heat mat and fix it at one end of the enclosure to ensure a temperature gradient can be achieved. The tank will be warmer near the heater and cooler at the other end.
|
|
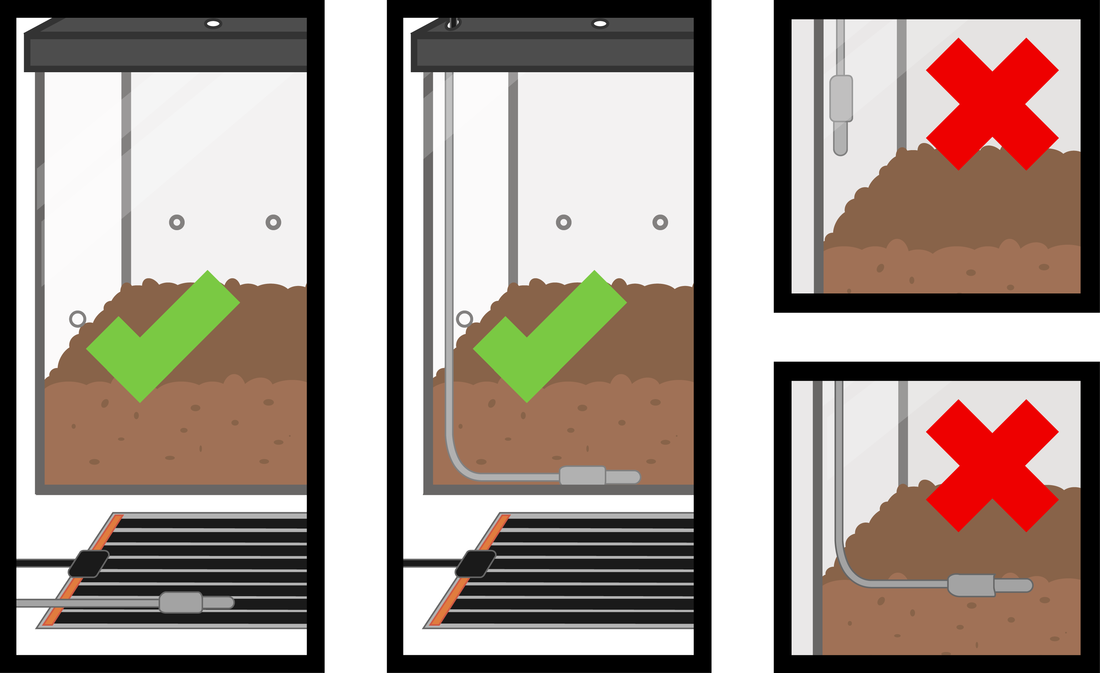
3. There are 2 different ways how to set up the sensor:
|
Option 1 – This is the safest option and the one we advice. Place the thermostat sensor directly in the middle of the heat mat attached with electrical or heat proof tape. When using this method one should keep in mind that some heat is lost as it enters the tank, and thus the temperature should be set a little higher. It is advised to use a thermometer to monitor the temperature inside the tank, and set your thermostat accordingly. Option 2 – This is an acceptable way, but probably best left for the more experienced. Place the thermostat sensor in the soil above the centre of the heat mat, not more than an inch from the bottom or the side where the heat mat is. To avoid the risk of the snails digging their way to the sensor and moving it out of place it is advised to attach the probe to a piece of wood or to use a very good suction cup to keep it in place.
|
|
4. Set the dial on the thermostat unit to the highest part of the temperature range required by the species to be housed. (This can be found on ) This way we know that the temperature at the warmest part of the vivarium will be regulated by the thermostat and should be the warmest of the preferred range for that species, with warmer and colder temperatures at either end of the enclosure.
5. Plug in and switch on the thermostat and allow a couple of hours for the temperature to stabilise.
6. Use a thermometer to check the temperatures all the way along the vivarium from the cold end to the hot end. Make sure these are suitable for the animal, always ensuring that the snail has a choice of a warm end and a deep end, preferably with places to hide and sleep in both ends.
7. Check the temperatures of the tank regularly to ensure the best environment for your snails.
|
|
|
|
|